
Want salon-like nails without the salon visit?
A nail buffer block is one of the simplest tools you can use at home to clean, smooth, and shine your nails. But here’s the catch, buff it wrong, and you could end up with thin, damaged nails that split easily.
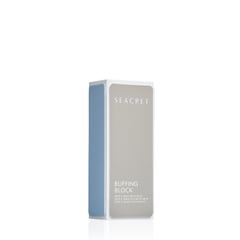
We will help you understand what a nail buffer block does, how to use it correctly, and what mistakes to avoid. If you’re using the Seacret Nail Buffer, you’re already ahead. It’s designed to be gentle, portable, and beginner-friendly. Let’s get started.
What Is a Nail Buffer Block Used For?
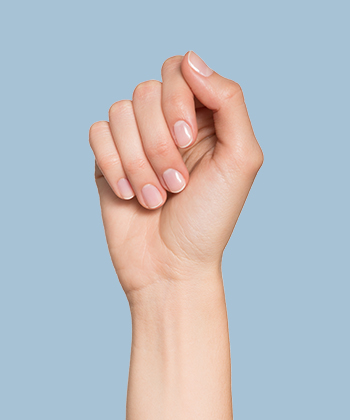
A nail buffer block improves the appearance of your nails without polish or gel. Think of it as a grooming step for both men and women. It smooths out surface ridges, removes dullness, and brings out your nail’s natural shine.
You can use it:
-
As the final step in your manicure or pedicure.
-
Before applying nail polish, apply a base coat for better adherence.
-
As a no-polish shine tool for clean, natural-looking nails.
Seacret’s buffer block is made in Korea and works well for both hands and feet. It’s compact, safe for regular use, and saves you time and money spent at nail salons.
How Do Nail Buffer Blocks Work?
A buffer block uses gentle abrasion to level out the nail’s surface. It removes fine ridges, flakes, and dead cells. The result is smoother, shinier, healthier-looking nails.
The Seacret Nail Buffer comes with three distinct surfaces:
-
Blue side: For buffing.
-
Gray side: For smoothing.
-
White side: For finishing and shining.
Each side has a different grit level. When used in order, they gradually refine your nail surface without stripping layers. If you follow the correct steps, there’s no risk of damage.
Step-by-Step: How to Use a Nail Buffer Block from Seacret Correctly
Step 1: Clean your hands
Wash your hands with soap and water. Dry them thoroughly. Buffing on wet nails is not recommended, as it can make them more prone to breakage.
Step 2: Trim and shape
Clip or file your nails to the desired shape. This helps maintain an even surface and makes buffing easier.
Step 3: Start with the gray side
Use light, even strokes to smooth out ridges and texture. Always move in one direction, not back and forth. This reduces the chance of thinning your nail.
-
Buff each nail no more than 2 to 3 times.
-
Avoid pressing too hard.
-
Focus on the center of the nail, then gently glide to the sides.
Step 4: Move to the green side
This step polishes the surface and preps it for shine. Repeat the motion you used in the previous step.
-
Buff each nail for 2 to 3 passes.
-
Keep your pressure light and consistent.
Step 5: Finish with the white side
This is where the shine happens. You’ll notice an instant glossy finish without needing to apply any polish.
-
Buff until you see a natural glow.
-
Usually, 3 to 5 strokes are enough.
-
You can repeat this step more often than the others.
Step 6: Apply cuticle oil or hand cream on your nails
Moisturizing after buffing keeps your nails from drying out. Look for formulas with jojoba oil, almond oil, or vitamin E.
What Mistakes to Avoid When Using a Nail Buffer Block?
Even the best tools can cause harm if used incorrectly. Here are common mistakes that lead to weak, peeling, or discolored nails:
Buffing too often
Stick to buffing once every 2 to 3 weeks. Overuse removes protective layers and weakens the nail.
Using aggressive pressure
Hard buffing doesn’t give you a better shine. It damages the nail’s surface and can cause sensitivity.
Ignoring the side order
Each side of the buffer has a purpose. Skipping a step or using the wrong side first can lead to uneven results.
Buffing nails when wet
Nails absorb water and become flexible. Buffing them in this state increases the risk of over-thinning.
Sharing buffers
Avoid using your buffer on multiple people. Nail buffers are personal-use tools and should not be shared.
Why Choose Seacret’s Nail Buffer?
You have options, but Seacret’s buffer block brings together ease, quality, and thoughtful design.
What sets it apart:
-
Made in Korea for quality and durability
-
Over 3 million units sold worldwide
-
Works for both manicures and pedicures
-
Creates a lasting shine in under 10 minutes
-
Compact and portable for travel
-
Gentle enough for beginners, effective enough for pros
It’s a one-time buy that saves time, money, and salon visits.
Can Men Use Nail Buffers Too?
Yes. Buffed nails are part of clean grooming, not a gender-specific routine. If you don’t want polish or gel but still want healthy-looking hands, buffing is a good habit to build. Many professionals, from stylists to consultants, include it in their grooming routine.
Final Thoughts
Buffing is about enhancing what’s already there. And when done right, it takes just a few minutes.
If you’re building a simple, effective self-care routine, start with your hands. Clean nails, even without color, leave a lasting impression.
Looking to try it for yourself?
Browse the Seacret collection and explore more nail care essentials designed for every lifestyle.
Frequently Asked Questions
-
How do I know if I’m over-buffing?
If your nails start to feel hot while buffing or become more flexible or see-through, it’s a sign you’re doing too much. Reduce frequency and apply a nail strengthener or oil.
-
Is buffing safe for thin or brittle nails?
If your nails are already weak, limit buffing to the white shine side and avoid the rougher surfaces. Always use gentle pressure.
-
Is a nail buffer block better than a metal file?
They serve different purposes. Metal files are for shaping edges, while buffer blocks work on the nail surface to smooth and shine. Avoid using metal files for buffing.
-
Can nail buffers remove stains from nails?
They can help with surface stains caused by polish or buildup, but they won't remove deep discoloration. If your nails are yellow or stained, limit polish use and try soaking in lemon water before buffing.